i've been busy....continued
>> Sunday, September 04, 2011 –
crafty stuff,
easyPeasy,
inspired by...,
Make. Create. Sew,
sewing
and carrying on finally with the last post.....the bits and bobs i've been making the past week:
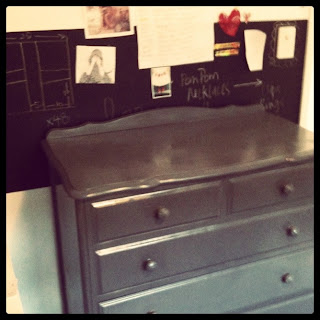
item three: drawers
when: last sunday
inspired by: numerous pins on pinterest
first pics were the before photos. this was a hamme-down (the way i say hand me down) from a friend and it's been my cupboard/drawers for a few years now. it's pretty but not very practical. the paint has been flaking off and i've never got around to painting it. until last sunday. this went hand in hand with cleaning out my cupboards. so it got a lick (spray in my case) of paint - in a neutral colour as this will be our babies drawers when we have babies - and now lives in my sewing room.
there's nothing in it yet.
i'm getting to that part.
item four: cross top + skirt
when: over the last week [cross top] + this morning [skirt]
inspired by: this polly dolly post
this was the last polly dolly i did. i loved this set. especially the 2 outfits on the edges. and that bag. far out i love that bag! but the thing i knew i could create was the outfit circled. it's been in my mind awhile now. so decided to re-create it.
the cross top: a quick tutorial
hard to call this a tutorial really.
i bleached a shirt. it started out like this:
a few days of sitting in bleach later and i had a white shirt again. i specifically chose a shirt in kmart that said DO NOT BLEACH on it. figured then if i bleached it it would go back to white! and i must say it took a while longer than i thought. i was scared the bleach would eat the shirt if i just left it to soak and had read on numerous blogs that you were supposed to bleach and rinse and repeat. i bleached it (in diluted bleach) and rinsed slightly then let it sit for a bit uot of the bleach. it seemed to work better this way. then repeated this a few times. i'm pretty happy with the whiteness now.
i then got together my supplies: paint, masking tape, new white top, fabric fixative anda paintbrush. plus an old newspaper or cardboard to put in the middle of your shirt.
mark out the cross with tape...i actually used a ruler for this. i eyeball everything but found the ruler/tape measure to be better. it would have pissed me off if the corss was a bit crooked or one part of it was. i painted the edges first, then moved my into the middle. when i do this, i find it's best if you almost push the paint into the fibers of the fabric rather than just paint it in. really get the paint in there. this seems to make the paint wear better and looks more like it's been printed on.
then chuck it in the dryer for half an hour to really set the paint when it's all dry.
took me hardly any time at all. the bleaching took the longest.
the skirt:
is in the fabric above. i don't have any photos of it yet. it's a midi skirt and has an elasticated back. and this happened by complete accident which is amazing because i've been wanting to attempt this type of waistband for ages.
i started this before our fathers day brekky this morning and finished it about half an hour ago.
it has pockets and everything.
although i may need to unpick those and move them up the skirt a bit.
(i also just "made" the "mt tape" that the fabric is "stuck on"with too. might do a quick tutorial for that over the next week)
(and i apologise for the amount of "inverted commas" in the previous sentence!)
what have you been making lately?
tara louise.


